Sensory Collage Easter Egg Art Project

Are you looking for Easter egg ideas? The sensory collage Easter egg art project is great for your classroom activities. It introduces children to the important senses of the human body with Roylco’s Sensory Collage Kit. It’s also great for working on fine motor skills.

Age: 5+

Duration: 15 minutes

Learning Outcomes: Exercise fine motor skills. Practice sorting materials by color and texture. Learn about collage art. Develop sensory awareness.

You’ll Need: 

Pull out a wavy sheet from the R15413 Sensory Paper package, choose your favorite pastel color, and draw an outline of an egg. Encourage kids to slowly move their palms and fingertips over the paper to feel the small raised patterns. Some kids may want to follow the patterns on the paper to create their designs, while others may want to create their own designs. You can color the wavy lines on the paper and it will divide the egg into different sections. You can make these lines as bold as you like.

Next, plan and place the sensory art materials you like on your egg. The Sensory Collage Kit contains 20 different sensory art packs to use in creating unique illustrations.

Before gluing the sensory art materials onto the artwork, you can play with the colors and the different textures. Think about which sensory art materials would best represent your Easter egg artwork.

Encourage children to talk about the color and the texture they use on the artwork and discuss what they feel. Is the color a warm color or a cool color? Is the material rough, hard, scratchy, smooth or bubbly? After exploring the materials, children can start to glue the sensory materials onto the artwork.

The artwork is almost finished. Have the children cut out the egg and glue it on to the  cardstock. Here is our sensory collage Easter egg artwork. Write your name on the artwork and take it home for your Easter celebration!

For more information please visit http://roylco.com/shop/r75419-sensory-collage-kit


Color Diffusing Easter Egg Artwork

Make beautiful color diffusing Easter Egg Artwork by using Roylco’s R15213 Color Diffusing Paper™! 

Age: 3+

Duration: 5 minutes for painting and assembling, couple of hour for drying.

Learning Objectives: Use fine motor skills to squeeze paint from pipettes onto paper. Learn about the process of diffusion with beautiful Color Diffusing™ technology.

You’ll Need:

• R15213 Color Diffusing Paper™

• R54470 Junior Heart Paint Pipettes

• Watercolor paint

• Paint tray

• A Cup of water

• Cardstock

Use white chalk to draw an outline of an egg on to Roylco’s R15213 Color Diffusing Paper™ . Then create some patterns to design your egg. I also wrote ” Happy Easter” in the middle of the egg. Encourage children to use their imagination to create their own designs.  

Next, place the paper in the paint tray. Wet the R15213 Color Diffusing Paper™, and use Roylco’s R54470 Junior Heart Paint Pipettes to drip liquid watercolor paint over top of the wet surface. Encourage children to experiment with different color palettes. It’s lots of fun for children to play with different colors and watch the colors flow and blend to create spectacular patterns and effects.. This is a great time for children to learn about color mixing, ask the children to discuss the effects of color mixing.

Let the artwork dry in the paint tray for couple of hours.  You can also use a blow dryer to dry the artwork. You can see the result is unexpected and beautiful.

The color diffusing Easter egg artwork is almost ready. Once the paint is dry, you can cut the egg out and glue it on to the cardstock.

For more information please visit http://roylco.com/shop/r15213-color-diffusing-paper


A Pot Of Gold for St. Patrick’s Day

Are you looking for craft ideas for St. Patrick’s Day? Create some decorations to make the house and classroom more festive. Lets make a spiral rainbow and pot of gold.

Age: 4+

Duration: 5 minutes

Learning Outcomes: Exercise fine motor skills. holiday activities. Makes a perfect take-home craft.

You’ll Need:

Choose your favorite pattern from Roylco’s R15295 Rainbow Paper Pack.

Draw a spiral at the back of the paper.

You can also glue two pieces of rainbow paper together to create a double-sided sprital.

Use scissors to cut from the end of the outline toward the center to make a spiral.

Take two pieces of metallic paper from Roylco’s R15409 Economy Metallic Paper Pack.

I choose dark green paper to make the pot, and the gold colored paper for the golden coins. Draw the shape of a pot at the back of the green paper, and cut it out. Make the coins by cutting out some circle shapes from the gold paper. Then glue the golden coins on to the green pot.

After you finish making a pot of gold, you can glue it to the end of the rainbow.  Once complete, hang from ceilings, on bulletin boards or anywhere that could use some extra color.


You are the pot of gold at the end of my rainbow!

Celebrate The Lantern Festival with Stained Glass Lanterns

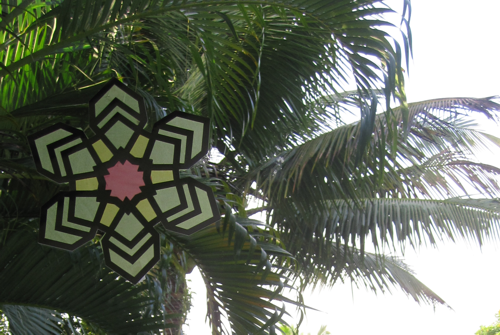
Create luminous lanterns to string up in your classroom or send home as great gifts! The 3D lanterns are cleverly designed to make assembly easy for little hands. Lanterns are a wonderful example of a cultural and historical artifact that you can discuss
in your next social studies class.

Our stained glass lanterns look a lot like the Andon and Crystal Magic lanterns used in Japan and China, respectively. Your students can be creative and can color in the lanterns any way they like. Adding stained glass to a lantern is a recent trend of turning a practical or useful lamp into a pretty and decorative piece of art.

Age: 4+

Duration: 10 -13 minutes

Learning Outcomes: • Develop fine motor skills • Explore creativity
• Discover lantern and stained glass history   • Use basic design techniques to develop ideas • Learn about Chinese and Japanese lanterns • Combine social studies with arts and crafts  • Use multiple media to create a multi-use craft

You’ll Need:

  • R52093 Stained Glass Lanterns
  • R15275 Stained Glass Paper
  • Crayons or markers
  • String
  • Glue Stick

  1. Each of the lanterns features 4 sky-themed designs. Each design is made to look like a stained glass window. The illustrations include a sun, moon, butterfly and bee. Cut out sections of colored tissue paper or R15275 Stained Glass Paper to glue under the designs.
  2. You can use different colors for parts of one illustration. For instance, paste white tissue paper pieces over the bee’s wings. Alternate and paste yellow and black tissue paper pieces across the separate sections of the bee’s body.
  3. Fold in the lantern along the pre-scored creases to make the lantern three dimensional.
  4. You’ll notice that its side edges are slightly smaller than the rest of the tab. These side tabs will help hook the tab in place when you insert it into the slot. Gently open the slot to loosen it up. Insert the tab into the slot by edging in first one side of the tab then the other.
  5. Finally, fold in all four tabs on the sides of the triangular roof flaps.
  6. Pass a length of fishing line, yarn or string through the holes of all four
    roof tabs and tie a knot at the top to secure.

Now you can hang your lantern along a length of string with other lanterns in sequence or you can hang the lantern directly from the ceiling.

Celebrate Chinese New Year or the start of spring by stringing up the lanterns. You can also send the beautiful lanterns home as Mother’s Day gifts or for any other special event.

Please visit http://roylco.com/shop/r52093-stained-glass-lantern for more information.


NAEYC 2015 – A Great Turnout!

naeyc 2015

This year, the creative folks at Roylco returned to the Annual NAEYC Conference, which was being held in sunny Orlando, Florida! Check out some of our favorite moments captured on our cameras! Continue reading

Feely Bag Find-It Letters

Feature-Image-eyespygameCan you find all the letters of the alphabet? Check out our tutorial below for an easy-to-make game students will love playing with during rainy days! This project uses our R2184 Manuscript Letter Beads which help students feel for the shape of each letter as they search for them!  Continue reading

Life on Seaside Farms uses our True To Life Human X-Rays!

As part of their “Fall Fun” special post, the Life on Seaside Farms II blog posted a photo of their children playing with our R5911 True To Life Human X-Rays! This science product is a great way to introduce younger grades to basic properties of the human body. Continue reading

Craft Spotlight: Exercise Animals!

Feature-Image-exerciseanimalsExercise Animals get children up and moving! First decorate the animals with paint, and color in the printed paper with crayons or markers. Assemble the animals in three easy steps. Watch a video below to see how it’s done, then check out our Art Campers taking off in an animal stampede! Continue reading

Loralee Lewis uses our Paper Doll Pads!

nofussfabulous_gathertogethergarland-300x210Loralee Lewis makes beautiful stationery for sale at her website here. Loralee’s experience with paper makes this Paper Doll Pad project an innovative craft for Thanksgiving! Celebrate diversity with fun paper doll characters for your Thanksgiving table! Continue reading